
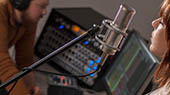


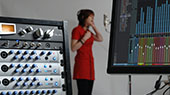


Whether you’re broadcasting a sporting event, live streaming a house of worship service, or creating your own podcast, selecting a digital mixer and configuring it for your needs can be daunting. With so many affordable options on the market, it can be difficult to determine what features you need to look for and what features will help you to make the most from your investment. PreSonus has put together this guide to help you determine which digital mixer is right for your application.
Making the Connections
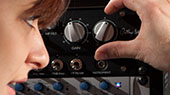
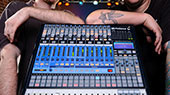
 The first thing to consider is the front end. A great-sounding broadcast begins with high-quality mic preamps and top notch digital signal processing. PreSonus StudioLive Series III digital mixers provide up to 32 remotely controlled XMAX mic preamps onboard. XMAX preamps are designed to provide transparent performance for condenser and dynamic microphones alike.
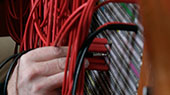
Mixers that provide more channels than physical inputs, like the StudioLive 32SC can easily be expanded to 32 inputs by adding an NSB 16.8 stage box connected by a single Ethernet cable. There are several advantages to choosing a mixer with remote-controlled mic preamps. The first of which is that the preamp trims can be saved and recalled. This means that your broadcast will sound consistent every time.
For podcasters and pre-recorded broadcasts, StudioLive Series III digital mixers and Studio One provide the unique ability to save your mixer’s preamp level with your Studio One session. Because Studio One and StudioLive digital mixers were designed to remote control one another, preamp trims, phantom power, and polarity can all be set directly within Studio One as you record enable each channel and set its level. This allows you to set the input trim of your sources while looking at your recording meters, significantly reducing the risk of setting levels too high or too low.
Getting that “Radio” Sound
Modern digital mixers are equipped with a plethora of processing options. As any professional broadcast engineer will tell you, having the right signal chain of expanders, compressors, and EQs is the secret to getting that broadcast quality voice tone with which we’re all familiar. Most digital mixers provide limited plug-in models that can be inserted on several channels at once.
 StudioLive Series III digital mixers take this one step further and provide state space modeled compressor and EQ plug-ins on every input and output bus. This not only allows you to process each channel individually, but your main and producer mixes as well, so your broadcast sounds professional.
Like preamp settings, StudioLive processor parameters can be stored in Studio One as well. This provides the unique ability for pre-recorded broadcasters to punch in overdubs with the same signal processors they used while recording. Because the StudioLive Fat Channel plug-ins run natively in Studio One as well as on your StudioLive digital mixer, you can even use these processors on bumpers, commercials, and outtakes.
Taking Phone Calls
Incorporating phone interviews into your broadcast is common and difficult to achieve with most digital mixers. This is because the audio from your call application (usually Skype or something similar), must be recorded in whatever application you’re using to record your broadcast. At the same time, you must also create a ‘mix minus’ so that your caller can hear you without creating a feedback loop.
Many podcasters solve this problem by cabling multiple devices together. StudioLive Series III digital mixers solve this problem by providing a powerful digital patching system that is unparalleled in their price class.
Let’s take this common scenario:
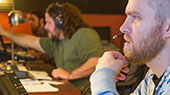
Four people get together to create their podcast in the same studio. The on-air talent periodically adds phone interviews to change up their format. For the purposes of our example, this podcast is recorded in Studio One with the interview occurring on the same computer using Skype and the StudioLive 32SC as the audio interface and broadcast mixer. Using Digital Patching and the 64x64 USB 2.0 audio interface, you can multitrack the entire podcast as follows:

- Four microphones are connected to the first four channels on a StudioLive 32SC to be multi-tracked in Studio One and mixed later.
- Using FlexMix 1, we'll create a mix minus for the Skype caller to hear. By default, every FlexMix is configured as an aux mix.
- Using FlexMix 2, we'll create a send to Studio One to record the Skype call.
- The in-studio talent will be able to monitor themselves and the caller using the Main Mix on the StudioLive 32SC.
Step 1: Create a Mix Minus
After you've gain staged your microphones, select FlexMix 1 on the digital mixer and create a blend of the four microphones to taste.
Step 2: Set up your digital patching
- Because Skype can only access the first input of an audio device, the mix minus on FlexMix 1 must be patched to USB Send 1. Open the Digital Patching menu on the StudioLive 32SC and patch FlexMix 1 to USB Send 1, this will be the source for Skype. Be sure to raise the output level of the mix.
- In the Digital Patching menu, patch FlexMix 2 to USB Send 6. This will be the source that you’ll record in Studio One.
- Patch Channels 1-4 (your microphone channels) to USB Sends 2-5 to be recorded in Studio One.
Your USB Send Patch menu should now look like this:

Step 3: Configuring Skype
- In Skype, open the Audio/Video setting and select your StudioLive 32SC for both the microphone input and the speaker output.

- While Skype must use the StudioLive 32SC's USB Return 1-2 (macOS) or USB Return 37-38 (WIN), this return can be patched to any channel you like. For our example, we'll be patching the Skype playback to Channel 5 on your digital mixer. To do so, select Channel 5 on your mixer and patch USB Return 1 (macOS) or USB Return 37 (WIN) to it. Skype outputs the same mono signal on both the left and right output. Because of this, you only need to record one side. Note: The System Audio for macOS is freely routable using Audio MIDI Setup. This example uses the default routing. If you have changed the output of your System Audio to another pair of USB Returns on your mixer, you must patch that same return to Channel 5.

- Select FlexMix 2 and raise the level of Channel 5 as well as the FlexMix 2 output level. This is your send to record the Skype caller in Studio One.
Step 4: Record it in Studio One
In Studio One, you will need to create 5 new audio tracks and configure them as follows:
| Audio Source | StudioLive 32SC USB Send | StudioLive 32SC Channel |
|---|---|---|
| Microphone 1 | StudioLive USB Send 2 | Channel 1 |
| Microphone 2 | StudioLive USB Send 3 | Channel 2 |
| Microphone 3 | StudioLive USB Send 4 | Channel 3 |
| Microphone 4 | StudioLive USB Send 5 | Channel 4 |
| Skype Caller | StudioLive USB Send 6 | Channel 5 |
Be sure to set your Main Output in Studio One any pair of StudioLive USB returns other than USB Returns 1-2 (macOS) or USB Returns 37-38 (WIN). You must reserve these USB Returns for your Skype call. For more information on using Studio One to record a podcast, please review this article.
And you’re now ready to record your live show! Best of all, you can use StudioLive’s Fat Channel processing to make your Skype caller sound as clean and present as your in-studio talent.
Adding Sound Effects and Jingles
 Adding pre-recorded sound effects, jingles and commercials is greatly simplified with today’s digital mixers, thanks to onboard bi-directional audio interfaces. PreSonus includes Studio One Artist with every interface product we make, including our StudioLive Series III digital mixers. And with Studio One’s drag-and-drop workflow and easy to use pad sampler, adding bumpers and commercials for live broadcast is greatly simplified.
All you have to do is drag in the Impact XT sampler and assign it to the desired USB return, StudioLive digital mixers provide 64 from which to choose.
 Once Impact XT is opened, drag your desired audio files to each pad. Now all you have to do is click the pad when you want an audio file to play. Or add a PreSonus ATOM pad controller for even faster access.
The Professional Choice
With flexible digital patching, powerful processors, dozens of high-quality mic preamps and more, StudioLive Series III digital mixers are a fantastic solution for any sized broadcast. As an integrated solution, they provide a cost-effective, space-saving option combining all the analog I/O you need with the high-quality converters, state space modeled plug-ins, and digital patching you want for professional broadcasting results.