


The folks at PreSonus listen to podcasts at work, at the gym, in traffic on the way to gigs, and we all have the same pet peeve: bad audio.
If your podcast sounds bad, nobody will want to listen to it. The good news is that it is simple to get a great sound for your podcast. It just takes a little practice, a little patience, and a little post-production. And PreSonus makes the tools that will get you through the entire process from the recording your podcast to releasing it to your subscribers.
At the most basic level, all you need to produce a podcast is a computer, recording software with a few key features, a quality microphone, and a good audio interface. The last thing you want is for the quality of your audio to detract from the quality of your content. Following a few simple steps will make your podcast stand out as professional and polished.
Step 1: Selecting Your Podcasting Computer
 The first thing that you must have to set up a podcasting studio in your home is a computer. This can be a Mac® or Windows® PC, so you can continue to use whichever operating system with which you’re most comfortable. Make sure to check is the system requirements for the recording software you’d like to use to create your podcast. If you are purchasing a PreSonus audio interface, Studio One Artist is included for free with your audio interface, so you're ready to start recording your podcast as soon as you open the box. Keep in mind that the “minimum system requirements” published by any accessory hardware or software manufacturer are just that: The bare minimum computer specs that you need to get the bare minimum level of performance.
The better your computer specs are, the better the performance you can expect from the software you're using to record your podcast. You’ll also want a computer that will grow with you as your podcasting skills improve, so invest in the best computer you can afford.
The next thing to consider is the transport protocol your audio interface requires (more on selecting an audio interface for your podcast next). This is the method of communication your audio interface uses to transfer data to and from your computer. The most popular protocols currently in use are USB 2.0, USB 3.0, USB-C™™, and Thunderbolt. While there are still FireWire products in production, you will find that these are generally compatible with Thunderbolt. If you’re just getting started, PreSonus recommends that you select a newer protocol to provide you with the most longevity from your investment.
Step 2: Selecting an Audio Interface for Podcasting
 An audio interface is an essential component in any podcasting studio. Its main function is to convert analog audio to digital audio and vice versa, so you can record your podcast to and play back from a computer. But more than just the converter that translates what you are hearing into information your computer can understand, an audio interface is the central hub around which your podcasting studio is connected. Your audio interface may also include any or all of the following: microphone preamps, onboard monitoring functions, and even onboard plug-in processing, to name just a few of the features you may find.
PreSonus makes a wide range of audio interfaces that are designed to suit just about any podcast format you have in mind. These interfaces range from small compact devices like the AudioBox USB 96 to professional 32-channel mixers with integrated recording and DAW control like the StudioLive 32SC. Let’s go through some of those options and why you would select one over the other depending on how you’d like to record your podcast.
Simultaneous I/O
The first thing you need to decide is how many channels you need to record at the same time for your podcast. It is critical to note, that this is your input channel count only. You don’t need to include the prerecorded material (opening music, bumpers, etc.) that you will be adding to your podcast in post-production. If you are recording an interview format podcast that will include more than one guest, do you want them to share a mic? Or have their own? Either will work, you just need to decide what will work best for your budget and your technical expertise. Shared microphones will require a little more mixing and leveling on the back-end. Individual microphones will require a little more level adjustments and monitoring configuration on the front-end.
Monitoring and Latency
How you listen to yourself while you record your podcast is critical to getting a good performance or a natural conversational flow. This is where latency comes into play. Latency is the time it takes for the sound you are generating to come back to your headphones, and there are many things that impact it. (For a deeper dive into Digital Audio Latency, please see this article). What you need to know while selecting an interface for your podcast is how you will avoid it.
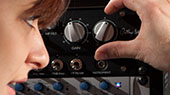
 Many audio-interface manufacturers have solved the problem of monitoring latency through a DAW by providing zero-latency or low-latency monitoring solutions onboard their interfaces. One of the easiest solutions is to simply blend the analog input signal with the playback from the computer. The simple analog Mixer knob on the front panel of the PreSonus AudioBox USB 96 and AudioBox iTwo allows you to blend the analog (pre-converter) input signal with the stereo playback stream from the computer.
A similar solution is utilized by the AudioBox iOne, Studio 26c, and Studio 68c. These interfaces provide a Direct Monitor switch that sums the analog signal with the playback streams, giving you an equal mix of the two while you're recording your podcast.
More advanced interfaces, like the Studio 1810c and Studio 1824c, provide an onboard DSP that allows you to create a basic monitor mix for everyone participating in your podcast. Some interfaces, like the Studio 192, provide a powerful onboard DSP with most of the functions one would find on a digital console. Anyone who has recorded using a PreSonus StudioLive® mixer (or anyone who has tracked with any mixer, for that matter) knows how important it is to be able to record a track while hearing compression and equalization.
The Studio 192 provides the same user experience as monitoring through an outboard mixer, without the additional cost, complexity, and cabling that kind of setup entails. These devices are equipped with a powerful onboard DSP that is capable of running 16 instances of the Studio One Fat Channel plug-in, giving you noise gate, expansion, compression, and EQ on every analog input channel. Because this signal processing can be printed while you record, this can be a great time-saver for your podcast, especially if you have a preset sound that you've perfected.
Of course, the ultimate solution is to have an audio interface that is so fast that you can monitor directly from your DAW and use any plug-in you like while you're recording your podcast. To that end, PreSonus offers the Quantum-series Thunderbolt interfaces. These interfaces offer less than 2 ms of roundtrip latency on most systems, allowing you to monitor your audio from the same application to which you’re recording your podcast.
Form Factor
 We’ve discussed rackmounted and desktop audio interface solutions for recording a podcast, but what if controlling everything from software isn’t for you? Maybe you’d feel more comfortable having more control at your fingertips, instead of under your mouse. Many modern mixers offer some level of audio recording ability, but PreSonus StudioLive mixers were designed to work in studio and live environments from their inception. These mixers simplify recording a podcast because all the controls you need are under your fingertips.
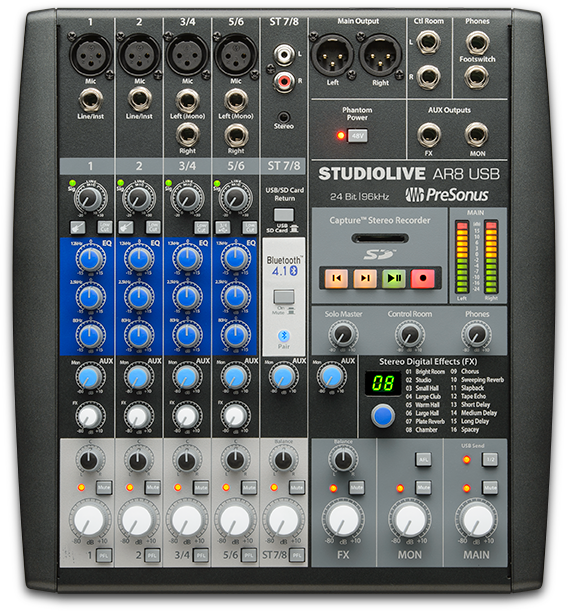 The StudioLive AR-series mixers are true analog mixers that allow you to record every channel plus the main mix. This means that you have the option of multi-tracking your podcast, or doing a live mix and recording a single stereo file. These mixers are also equipped with a stereo SD recorder, so that you can capture your podcast without your computer, providing opportunities to go mobile. If you want the power of a digital mixer with the simplicity of an analog one, the StudioLive 16.0.2USB provides the best of both worlds. This compact mixer provides compression and EQ on every channel, plus 12 XMAX preamps so your podcast will sound polished and professional. Just like the Fat Channel in the Studio 192 audio interface, the Fat Channel on a StudioLive 16.0.2USB can be printed as you are recording your podcast, streamlining the post-production process.
For professional podcasting applications, StudioLive Series III digital mixers offer many powerful tools that make them an ideal solution for anyone looking to create an enhanced broadcast environment. More information on why the StudioLive Series III digital mixers are the best digital mixer for professional broadcast and podcasting can be found here.
Loopback
If you are doing a call-in style podcasting format where your interviewees will be contacting you via Skype or a similar application, you will need to be able to create what is called a Loopback. This allows you to record the output of one application into another. Several PreSonus USB audio interfaces provide this feature in their Windows ASIO driver. The Studio 26c, Studio 68c, Studio 1810c, and Studio 1824c, as well as all four StudioLive AR-series mixers, support Looping back audio through their driver. Here’s a brief overview:
 The windows drivers for the Studio-series audio interfaces and StudioLive AR-series mixers provide two virtual streams that allow you to record the output of an audio application in another application. Loopback can be useful in a variety of situations, but the most relevant to our discussion is recording the audio from a video game, YouTube video, or Skype conversation for a podcast or livestream.
These devices also let you pick the streams on which the loopback audio will be recorded. When Loopback is enabled and “Merge Loopback with 1/2” is selected, the audio from another application will be recorded with the audio source connected to analog inputs 1 and 2 on your interface. This is great for situations where your recording application only provides a single stereo input. But why limit yourself?
Every PreSonus audio interface comes with Studio One Artist, which does not have any limitation on the number of simultaneous inputs you can use while recording your podcast. And even if you’re not using a PreSonus interface, Studio One Prime is FREE and you can download it right here.
When Loopback is enabled and “Dedicated Loopback Inputs” is selected, the audio from another application will be recorded on the last pair of driver inputs). This allows you to record your live audio from your microphones separate from the Loopback audio from your software so you can go back and mix the levels later so that they match. If you’re making a professional podcast, this is the option you will want to use.
Because the Studio-series interfaces and StudioLive AR-series mixers are class compliant Core Audio devices, these virtual streams are not available in macOS. However, there are several third-party applications that provide this functionality in macOS.
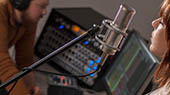
Step 3: Selecting Your Podcasting Microphone
 As with any audio production, good sound starts with a quality microphone. When considering mic selection for podcasting, you’ll want to pick one that pairs well with your voice. In general, a good condenser mic will give you the best sound quality for any podcasting application. However, dynamic microphones for broadcast are well known for their smooth sound. Because a dynamic microphone is not as sensitive as a condenser microphone, it will pick up less extraneous noise (air conditioner, gum smacking, dogs barking, etc.) while you're recording your podcast. However, dynamic broadcast microphones are notoriously low output. This means that you must use a mic preamp that will provide enough gain to get your mic signal at a level suitable for recording your podcast. The XMAX preamps on the Studio-series and Quantum-series interfaces are ideally suited for this application will provide lots of gain, with very little noise.
Some podcasters find a stereo mic useful for in-person interviews and discussions. Other people prefer two matched mono mics; this allows you to close-mic you and your subject for better separation and less room ambiance. Lavaliere mics are also a great choice for podcasting. The most important thing is to select a microphone that provides the sound quality you want at a price you can afford.
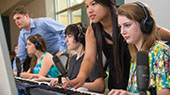
Step 4: Selecting Monitors for Your Podcast
 If you’re recording a podcast that is basically voice and maybe the odd jingle or two, you can probably do everything you need to do in pre- and post-production using headphones. However, for the most professional solution, especially if you are mixing down a multitrack session for your podcast, we suggest that you mix on nearfield studio monitors and double-check the mix on headphones. That’s because mixing multitrack audio is much more complex and can create a lot more subtle sonic problems, and you can hear things on speakers in a room that your headphones can’t accurately reproduce. Although your podcast subscribers are mostly going to listen on headphones or earbuds, some may be listening on their car stereo or home sound system, so you want to make sure your podcast sounds great everywhere.
To read more about selecting a personal monitoring solution for podcasting, please review this article.
To read more about selecting the perfect set of studio monitors for podcasting, please review this article.
Step 5: Selecting Your Podcasting Software
 We’ve already mentioned Studio One a few times and it’s not just because we make it. It’s because Studio One’s single window, drag-and-drop user interface is ideally suited for podcasters. No other recording application allows you quickly drag bumper music from a searchable browser right into your podcasting session. Want to add metadata tags to your audio before you push your podcast live? Upgrade to Studio One Pro and you get everything you need to tag your podcasts before you upload them. And you can upload your podcasts to Soundcloud right from within Studio One.
But don’t take our word for it. Try Studio One for your next podcast for FREE here.
Producing Podcasts: Preliminaries
Now that you have a general idea of the elements and tools involved in podcast production, let’s get down to the process of producing a great-sounding podcast.
Audio 101: Gain Staging
As with music production, you have to begin at the beginning, and that means proper gain staging. This critical step will make or break your final podcast recording. PreSonus has put together this brief tutorial to help you through it. We know what you're thinking: I just wanted to make a podcast, I didn't know there would be math involved. But trust us when we say that a little audio engineering expertise will make your podcast stand out amongst the competition to broaden your podcast's audience reach and revenue potential.
Audio 102: Fix it in the Mix
Live broadcasts have a team of talented engineers and very expensive mixers making sure that the on-air talent sounds their best. You can do the same for your podcast in post-production. Once your podcast is recorded, the real work begins. By adding compression and EQ to your recording, you will even out the sonic shape of it and make your podcast sound more professional. The good news is that if it’s mainly you and your cohost’s voices that are being recorded, once you find that perfect sound, you can save your channel strip setting as a preset and just drag and drop it onto your audio in Studio One when you are done.
Studio One comes with a suite of plug-in effects and provides everything you need to clean up your audio and get the best sound, including these amazingly useful plug-ins for podcasting.
Dynamics: Channel Strip, Compressor, Expander, Fat Channel, Gate, Limiter, Tricomp
Equalizer: Pro EQ
Stereo Panner and Imager: Binaural Pan, Dual Pan