
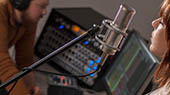


The ability to clearly hear your performance is critical to the success of any musician. If you can’t hear yourself or your bandmates well, your timing will slip, you’ll struggle with pitch, and you’ll have a very difficult time of performing to the best of your ability. Whether you’re performing in the studio, on a stage, or in a church, without a good monitoring system, you won’t be able to deliver your best.
PreSonus provides several solutions to help solve the problem of getting the right mix on stage. From smart floor monitors to personal monitor mixers, PreSonus can help you build the right solution for your application and this article will assist you in deciding which system is right for you.
Monitor Types

In the beginning, there were only two types of monitors: headphones and floor wedges. As time and technology have moved on, both have evolved and permutated into different solutions. The good news is that both can be adapted for musicians who must function as their own monitor engineers as well as those lucky enough to have a talented engineer standing by to make sure the musicians performing can hear themselves clearly.
In general, monitoring solutions can be broken down into variations of the following:
- Floor monitoring. This is a traditional loudspeaker with a trapezoidal shape so that it can rest back at an angle to aim up at the ears of the person standing nearest to it. While there are several configurations for this method, they all have something in common: a live speaker producing enough volume to overcome the level of instruments themselves. Until recently, this has been the preferred method for most live applications, because it is easy to use and relies on infrastructure that already exists in an installed or mobile sound system.
 Personal monitoring. These systems connect to some form of headphone, either in-ear or over-the-ear and allow each performer to isolate their mix from the rest of the band. This has been the preferred method in a studio environment because there is very little bleed from the monitor mix into the microphones that are capturing the performance for recording. Over time, however, personal monitoring has become more prevalent in the live environment because it allows performers to hear themselves more clearly while simultaneously lowering the stage volume, making Front-of-House mixing more manageable.
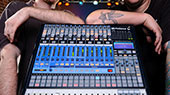
Using Auxiliary Buses to Create a Monitor Mix
 As its name implies, an aux mix allows you to create an alternate, or “auxiliary,” mix that can be routed to an output separate from the Mains. While Aux buses have many applications, they are most commonly used to create monitor mixes. When you turn up the aux send level on a channel, its signal is sent to the corresponding aux output at the level you choose. In this way, the same channel can be used to create several alternate mixes to the main mix.
Most mixers have some ability to send at least one monitor mix to the stage. Let’s say a mixer has one aux bus. On a mixer like this, each channel would have an aux send level control. This control adjusts the volume of each channel in the aux bus mix. You build your monitor mix by setting the individual aux-send levels for any channels you want in that mix. The aux mix output can then be connected to a stage monitor, a wireless in-ear system, or a headphone distribution amplifier. In this way, your musicians can listen to a monitor mix that can be controlled separately from the main mix that is going out to the house.
If you’re thinking an aux send sounds a lot like a channel fader, you’re way ahead of the game. Just as each channel fader allows you to create a mix for the main output, each aux send allows you to create a mix for the corresponding aux bus output.
While aux buses can also be used for outboard effects processors, overflow rooms, and subwoofer networks (among other things), if you’re using aux buses exclusively for monitors, the number of aux buses determines the number of discrete monitor mixes you can create. Most lower-cost mixers have one or two. Two aux buses provide two separate mixes, six aux buses provide six separate mixes, and so on.
Creating custom monitor mixes is critical. If musicians can’t hear themselves or their bandmates, their performance will suffer. A monitor mix can be mono or stereo. Most often, an individual live monitor mix is mono and is sent to a floor-wedge or sidefill monitor. Studio monitor mixes, as well as in-ear mixes on stage, are usually stereo because they are sent to a headphone amplifier that requires both a left- and a right-channel input. However, whether the end result is mono or stereo, the function of the aux bus is the same.
Personal Monitor Mixing
Recent advances in network control have opened up to the world of personal monitor mixing from the lowest priced digital mixers all the way up to advanced audio network systems. As its name indicates, a personal monitor mixing solution allows the people on stage to customize their own monitor mixes.
Why is this important?
Because of cost and space constraints, only the largest and most successful venues and touring acts can afford to hire their own monitor engineer. Like the Front-of-House engineer, the monitor engineer mixes sound, but only for the musicians onstage. Monitor engineers have to be able to create multiple custom mixes and respond to the needs of the performers almost instantaneously. And you thought the person mixing for the sold-out audience had a stressful gig!
While this is an ideal solution for just about any performer – after all, who doesn’t want their own personal engineer creating a mix just for them to sound amazing in their own ears! – this is out of reach for most situations and the vast majority of performers. In addition to the added cost of talented personnel, a separate monitoring environment requires additional equipment; namely a mixer with the sole purpose of mixing audio no paying member of the audience will ever hear – an expense most club owners, let alone church board members, can hardly justify.
The alternative to a monitor mixer and an engineer to operate it is to run everything from Front-of-House. This means that while making sure the guitar solo is loud enough for the most critical members of the audience, the Front-of-House engineer also has to deal with the lead singer making a frowny-face-this-guitar-is-too-loud-in-my-wedge sign on stage. Phew.
The folks at PreSonus have faced this problem from both sides of the Front-of-House console and confronted the problem head-on with the classic StudioLive® digital mixers by adding QMix™ control. QMix, and its successors, is an app that runs on your mobile device to remotely control the aux mixes on your StudioLive digital mixer.
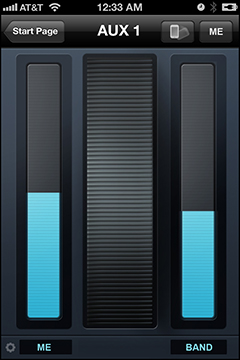 The latest version, QMix-UC, runs on your iOS® or Android™ device, which is then networked directly to your StudioLive Series III digital mixer using a standard wireless router. The app gives each musician onstage control over their own monitor mix.
For example, PreSonus QMix®-UC gives up to 16 musicians control over the relative mix levels of their own monitor mixes and makes creating these mixes easy with the Wheel of Me view. This lets you select multiple "Me" channels and turn them all up in your monitor at the same time, while controlling the relative balance between “Me” and the rest of the band.
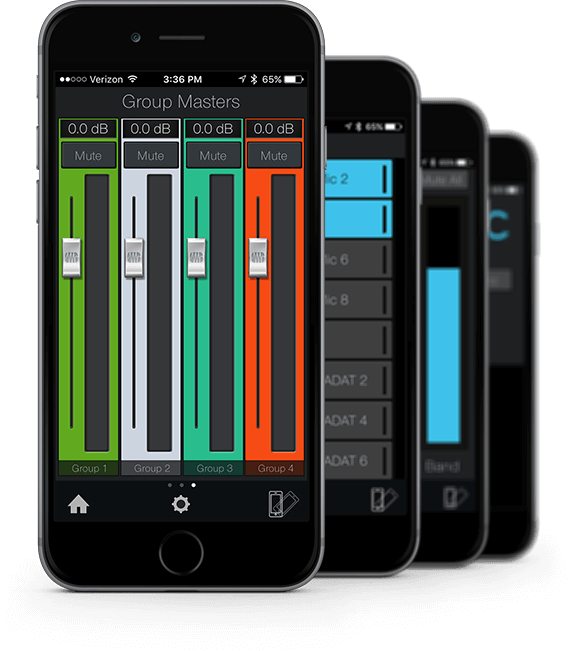 More advanced users can have complete control over the aux-mix send level and panning (for linked auxes) for each channel from the Aux view. These users can also create four custom groups. This allows them to divide complicated mixes into something more manageable by providing a master fader for a group of channels, while still maintaining the relative balance between them. This is especially useful for drums.
Because it runs anywhere, QMix-UC is a great solution for both floor and personal monitoring. But it has one problem that can’t be overcome: it is limited to the number of aux mixes available to it. QMix-UC doesn’t add mixes; it merely controls the mixes you have.
This is where the EarMix™ 16M and AVB Networking come into play. EarMix 16M is a dedicated 16-channel personal monitor mixer that networks to your StudioLive Series III console or rack mixer using AVB (Audio Video Bridging). Because the EarMix 16M mixes the audio source signals locally, you aren’t limited to the available aux mixes on your mixer. The EarMix 16M also lets each musician bring in a local source like a click track or backing tracks and blend it into their mix only.
 The EarMix 16M is equipped with both a loud, clear headphone amp and line outputs, so you can use it for personal monitoring with headphones or in-ears; or connect it to a floor monitor. Like QMix-UC, the EarMix 16M is flexible enough to support either application.
The EarMix 16M also allows you to add EQ and Limiting on each channel and because the StudioLive Series III digital mixers allow you to route just about anything to the AVB network, you can source signals from channels, FlexMixes, FX Mixes, or even the Solo bus. In this way, you can create submixes of your audio before it’s sent to the musicians, making it even easier for them to dial in the right mix for their headphones, in-ears, or floor wedge.
Learn more about incorporating an EarMix system into your existing mixing set-up here.
Floor Monitoring
Using a loudspeaker as a floor monitor is not as simple as just turning a speaker on its side and putting a musician in front of it. When a loudspeaker is placed on the floor and rotated, several considerations must be taken into account.
Wall Loading Effect
 Very low frequencies are not directional, so they radiate from the sides and back of the loudspeaker, as well as from the front. If you place a loudspeaker against a wall, the rear sound propagates back into the room. This can increase the bass frequency output as much as 6 dB if the speaker is placed near one wall (half-space loading), 12 dB if placed near two walls (quarter-space loading), and as much as 18 dB if you put the loudspeaker next to the ceiling or on the floor in a corner (eighth-space loading).
To have the most control over your sound, it’s best to start with the flattest response, so you normally should avoid wall and corner placement. On the other hand, if you need some extra bass boost, this technique may be worth a try. It is important to be aware of what’s happening and be prepared to take advantage of it or compensate for it.
Because a floor monitor placed on the stage is unavoidably subject to half-space loading, PreSonus AIR- and ULT-series loudspeakers feature a “Monitor” preset. This preset is specifically designed to compensate for bass buildup while maintaining a tight mid-bass response and a clear midrange.
Coverage Pattern
When used as a floor monitor, a loudspeaker’s coverage pattern will reverse (that is, horizontal coverage becomes vertical coverage and vice versa). In most cases, this new pattern offers benefits. For example, when laid down as a floor monitor, a PreSonus ULT12 has a 50˚ (H) x 110˚ (V) coverage pattern. As the dispersion narrows to 50˚ in the horizontal, the floor monitor’s energy is focused to a relatively limited area that won’t bleed over into either side, creating listening zones and better clarity. The 110˚ dispersion in the vertical allows the performer the freedom to move forward and back within their zone. For instance, a singer can stand directly on top of their floor monitor to reach out to the audience and hear their mix as well as they can when they back up to the front of the drum kit to jump off the bass drum.

While the PreSonus ULT-series full-range loudspeakers do allow you to rotate the horn so that the dispersion pattern is the same in both vertical and horizontal orientations, in general, this feature should be reserved for horizontal mains use, not for floor monitoring.
Ringing Out Monitors
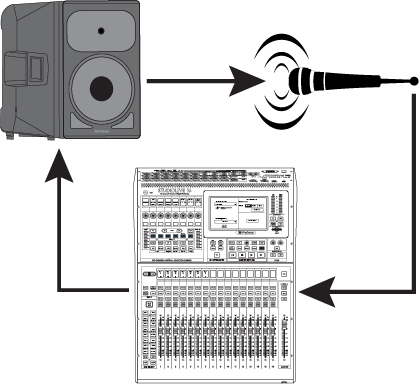 Feedback is the short term for a feedback loop, where a portion of the signal from the speaker returns to the microphone, resulting in a constant tone at the offending frequency. “Ringing out” is a process of attenuating the frequencies that are feeding back to maximize gain before feedback in your floor monitors.
1. With the mic input gain at an appropriate level, bring the aux send level up on the mic channel you wish to ring. Do not “gain up” the mic signal on the monitor mixer for the sake of getting more volume out of a stage monitor. Gain staging is very important in order to have a feedback-free show.
2. Slowly bring the aux output level up until you hear feedback. Do not make sudden gain boosts; go slowly and carefully to avoid causing damage to speakers and ears.
3. Using a real-time analyzer (RTA) or spectrograph will allow you to see which frequency is causing the problem, so you can then use an equalizer to remove the offender from your stage monitor. If you don’t have an RTA or spectrograph, you can create a narrow notch in a parametric EQ and sweep it across the band until the feedback is removed. Stage-monitor feedback typically occurs in the higher frequencies, which also is where intelligibility comes from, so only reduce the offending frequency to just below the point of feedback.
If you do not have these tools at your disposal, bring back the level on the channel send to just before the point of feedback so you don’t take out too much signal content. Maximizing your intelligibility and gain structure results in clearer-sounding monitors.
When you are ringing out a system, and more than two or three feedback loops are happening simultaneously, you have reached the level where stability can no longer be achieved. Try bringing down the overall output level or find a physical solution, such as moving the speaker or microphone.
Headphone Amplifiers and Distribution
 In its most basic form, a headphone amplifier takes a source signal and routes it to an amplifier that provides enough wattage to drive most any pair of headphones. You'll find headphone amps on every audio interface and mixer PreSonus builds. Some audio interfaces, like the PreSonus Studio 192 and Quantum, feature two headphone amps, each with their own stereo audio stream so you can customize the monitor mixes routed to each.
In some cases, the one or two headphone amps onboard your device isn't going to be enough. This is where stand-alone units come in. In general, a good headphone amplifier delivers enough volume for the headphones it's driving, with very low distortion. This last part is important because distortion causes listener fatigue and a fatigued ear is an inaccurate one.
Most headphone amps are rated at 50 to 200 mW per channel and provide adequate volume for a wide range of impedances (usually from 32 to 600Ω). When trying to determine if your headphone amplifier will properly power your headphones, you need to keep in mind a few things. First, power isn't just power, it's a function of both voltage and current. Without getting too far into the technical weeds, a general rule is that higher impedance headphones require more voltage and lower impedance headphones need more current.
Keep in mind, however, that only a few volts can make a high impedance headphone ear-splittingly loud, especially in the upper frequency range. This is where current comes in. If you want to get the tightest and most well-defined bass response, you'll need lots of current, not voltage. In other words, it's not about how much power you have, it's having the right kind of power.
Selecting the Right Headphone Amp
When selecting a stand-alone headphone amplifier, you'll want to first chose one with the right type and amount of power for your headphones. Once you've narrowed it down to units that will drive your headphones to the best of their ability, you'll also want to look at what specialty features these units offer that help make personal monitoring easier and more flexible for the greatest variety of applications.
Even if you don't own a pair of headphones with an unusually low or high impedence, you should always confirm compatibility before selecting a headphone amp. There are two specification numbers you'll need for your headphones when selecting an amplifier to drive them: Sensitivity and Impedance.
 Sensitivity is rated in dBSPL at a particular input signal level (usually 1 mW). For example, the PreSonus HD7 headphones have a Sensitivity of 98 dB / mW. This means that if you send them a 1 mW signal, the HD7 will produce 98 dBSPL. Each time you multiply the power by 10, you increase the sound pressure level by 10 dB. So, 10 mW into the HD7 will give you 108 dBSPL, 100 mW will give you 118 dBSPL, and so on.
But that power is met with resistence, or "impedance", so it depends on the voltage applied. Headphone impedance can be anywhere from 16 to 600Ω. Delivering 1 milliwatt of power into 16 ohms takes 126 mV, whereas delivering that power into 600 ohms requires 775 mV. So, the voltage needed to drive a headphone to a given loudness depends not only on the sensitivity of the headphones, but also the impedance of the headphones.
Let's go back to the PreSonus HD7 headphones. These have an impedance of 32Ω and a Sensitivity rating of 98 dB / mW. Selecting the right amp depends on how loud you're going to be listening to your music through those HD7s. For a good moderate to moderatately loud listening level of 110 dB, you'll need 16 mW, an RMS voltage of 0.71, and an RMS milliamperage of 22.3mV. If you're a math whiz, you can find the equations to make these calculations online. If you're not, you can find dozens of free calulators that will do the math for you. All you really need to know is your headphones' impedance and sensitivity to find their ideal matching power.
 Some headphone amps, like the PreSonus HP2, for example, allow you to switch between mono and stereo operation. This is especially useful in any situation where you don’t want to use up two aux mixes just to create a stereo mix for one musician. Even though the HP2 must be tethered to an analog audio cable connected to your mixer, it does allow you to cut the power cord and operate from a battery to provide greater freedom of movement.
 A headphone distribution amplifier takes a mono or stereo source stream and routes it to multiple headphone amplifiers simultaneously. A basic example is the PreSonus HP4, which takes a single stereo input and routes it to four separate headphone amplifiers, each with its own level control. Like the HP2, the HP4 provides the option to run all four amplifiers as mono mixes. It also provides a stereo monitor thruput, allowing you to connect multiple amplifiers, or in a live situation, connect a pair of floor wedges.
Some headphone distribution amplifiers, like the PreSonus HP60, offer more advanced features. In addition to being able to individually control mono and mute on each amplifier, each amp has its own external input so that the musician can blend in a feed of just their instrument or voice in addition to a mix of the two stereo source inputs. A "more me" control, if you will.
 Because of their simplicity, headphone distribution systems like the HP4 and HP60 are most popular in studio applications, so much so that PreSonus built in a 4-output distribution amplifier into the Monitor Station V2.
Whether you're monitoring on stage or in the studio, PreSonus has a solution that will work for you.