
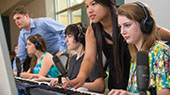


Selecting a mixer for your application can be a challenging task but the right mixer, properly gain-staged, will make mixing and recording much easier. This chapter will help you pick out the best mixer for your budget and set it up so that you get the best results.
Selecting the Right Mixer
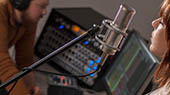
At the most basic level, an audio mixer does exactly what its name implies: mix audio signals. If you have more than one sound source (say, five microphones, an electric guitar, a bass, and a keyboard), you need a mixer to combine these audio signals so that you can control the relative balance between them before sending the summed signal to a loudspeaker system, recording device, etc. Because every signal comes into and out of the mixer, investing in a quality product is crucial and will save a lot of operational headaches.
Here are a few things to consider:
- Channel count. Also known as “frame size,” a mixer’s channel count determines how many sources can be connected to its channel inputs simultaneously. For example, a 24-channel mixer will allow you to connect at least 24 audio sources, although there may be additional specialized inputs, such as Tape and Talkback inputs. Some smaller-format consoles provide stereo channels in addition to mono channels. Stereo channels are counted as two inputs, even if they share a single channel. This is important to keep in mind as you make your selection.
- Connection types. In addition to knowing how many sources you’ll connect to your mixer, it’s important to know the types of sources. If you plan to mostly connect microphones, make sure to select a mixer with enough microphone preamps. If you will connect line-level sources, make sure your mixer has at least a few line inputs to reduce the need for direct boxes.
- Aux buses. Most mixers can send at least one monitor mix to the stage. This is typically done with auxiliary buses—“aux buses” for short. Each channel is equipped with a level control for each aux send. You build your monitor mix by setting the individual aux-send levels for any channels you want to be heard in that mix. The aux bus output can then be connected to a stage monitor or in-ear system. If you use aux buses exclusively for monitors, the number of aux buses you have determines the number of discrete monitor mixes you can create. Keep in mind that aux buses are usually mono, so a stereo monitor mix for in-ear systems will require two aux buses. Calculate your needs accordingly.
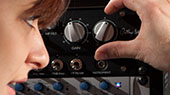
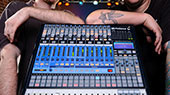
- Analog or digital. In general, there are two flavors of mixer: analog and digital. An analog mixer relies on electrical circuits and filters, whereas a digital mixer converts the analog signal into digital audio data that is sent to an onboard processor. After processing, the signal is converted back to the analog domain, where it can be sent out to speakers, personal monitoring systems, and so on. While both mixer types will provide basic level and pan control, each has advantages and disadvantages. In general, an analog mixer will be more affordable and simpler to use; digital mixers tend to be more complex but offer more functionality. We’ll discuss this in more detail later.
- Onboard signal processing. Most mixers will have some onboard signal processing on each channel, on each bus, or both. The more signal processing available on your mixer, the less money you will have to spend on outboard gear. In general, digital mixers provide considerably more signal processing than analog mixers, commonly including at least some dynamics processing and EQ. It’s also convenient to have reverb and delay effects built in. Make sure that onboard effects have their own dedicated aux bus, though; otherwise, you may have to sacrifice a monitor mix to add reverb or other effects to vocals and instruments.
- Recording options. Many modern mixers provide some level of integrated recording. This can range from a simple two-track recording of the Main mix to complete multitrack recording, either to an onboard recorder or to a computer or both. When evaluating computer recording options, look for the bus type (USB, AVB, FireWire, etc.), included software, and recording bit depth and sample rate. Most modern mixers with recording features offer 24-bit recording at 44.1 kHz or higher.
Analog Mixer Basics
At their core, most analog mixers share many of the same features and functions. The biggest advantage of analog mixers is that they’re generally less complicated and less expensive than digital mixers of the same frame size. The disadvantage is that analog mixers usually have fewer onboard features than digital mixers, and their sound quality depends entirely on the quality of the analog circuitry.
Some analog mixers, like PreSonus® StudioLive® AR-series analog mixers, use great-sounding analog circuitry, provide EQ on every channel, offer at least a few monitor mixes, and include at least a basic onboard effects processor for reverb and delay effects. StudioLive AR-series mixers also feature PreSonus’ unique, flexible Super Channel, which allows you to connect four stereo line level devices, including wireless stereo Bluetooth™ input.
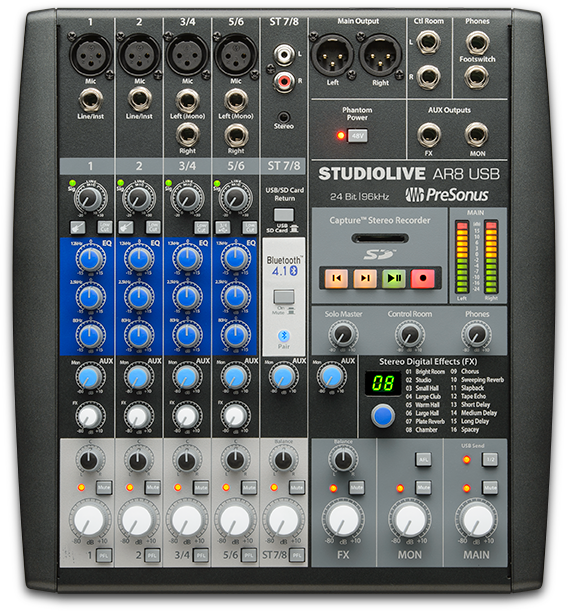
Many modern analog mixers also offer digital recording features. The most common implementation is a simple onboard 2x2 USB interface that allows you to record the main mix. Less common is the ability to record each channel individually. StudioLive AR-series mixers take this further, offering professional 24-bit, 96 kHz multitrack recording (every input channel, plus the main mix) over USB, as well as a separate onboard stereo SD recorder that enables you to quickly record the main mix or play hours of stereo recordings.
Digital Mixer Basics
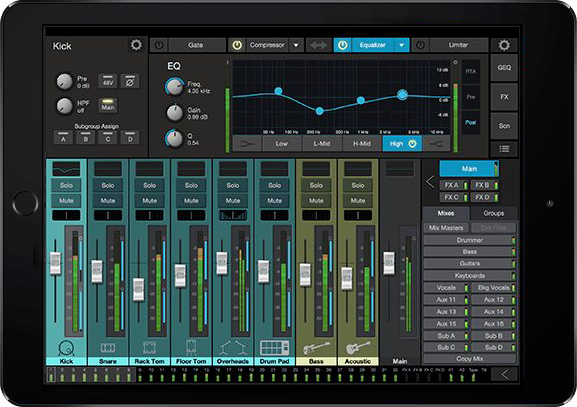
Digital mixers include the basic functions provided by their analog cousins and add many tools that save you money by eliminating the need for expensive outboard equalizers, compressors, noise gates, multi-effects processors, and the like. While you don’t need these processors just to mix audio, they are essential for producing better-sounding, more polished mixes. All these tools are done courtesy of an onboard digital signal processor (DSP). This processor is responsible for routing, level control, and so on. Full-featured digital mixers provide plenty of graphic and parametric EQ, dynamics processing, and more.
Traditionally, the complexity of digital mixers made them more difficult to learn but PreSonus StudioLive digital mixers changed that, providing a wealth of onboard signal processing without forcing you to dive into multiple layers and menus. The StudioLive’s surface-driven workflow has made them one of the most popular mixers in the world. Because the parametric EQ, compression, noise gate, and limiter are available on every input and output, you save the cost of outboard gear and mountains of cables, as well as the hassle of connecting it all.
Digital mixers also provide tools to address the problem of managing complex mixes. Population groups reduce the channels you’re viewing at one time. DCAs (Digitally Controlled Amplifiers) control the overall level of a group of channels.
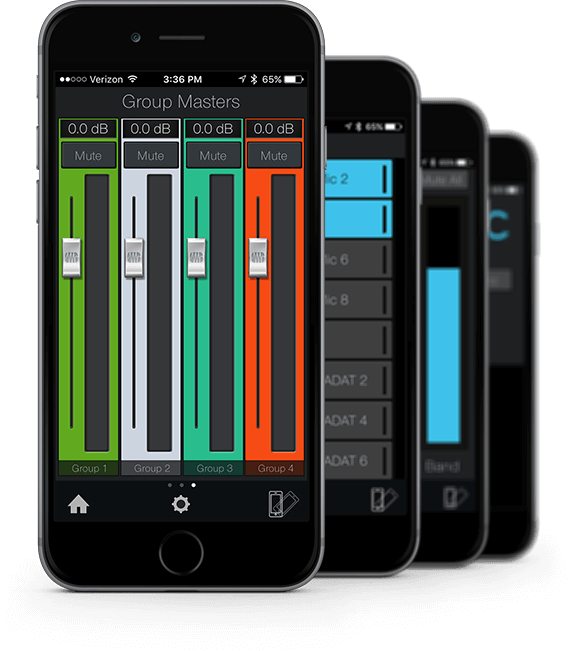
 StudioLive Series III consoles and StudioLive Series III rack-mount mixers combine the best aspects of these solutions with Filter DCAs. A Filter DCA can contain any combination of available input channels and effects returns, and you can create as many Filter DCA groups as you need. StudioLive Series III digital mixers allow you to include the same channel in multiple Filter DCAs so you can manage mixes in multiple ways. Each group is given a master level control so you can control the overall level of the group while maintaining each channel’s relative balance in the mix. In this way, for example, you can create a single fader to control every drum in a monitor mix and maintain the relative level of the drum mix that you created. You can even create a custom User fader bank that includes individual channels and Filter DCA group masters to simplify mixing even further. This is especially useful if a member of your band also doubles as your front-of-house engineer.
Both analog and digital mixers have long been available as traditional consoles and in rack-mount format. Rack-mount analog mixers and older digital rack mixers are usually controlled with knobs and perhaps small faders. But today’s digital rack mixers are more often controlled with a laptop, a tablet, a smartphone, or a networked hardware controller.
Let’s take a closer look at these two approaches:
Digital Console Mixers
 Digital console mixers, such as the StudioLive Series III mixers, typically look like their analog cousins, in that the analog front end and mixing controls are housed in the same chassis. Many modern consoles allow some level of modular capability, allowing you to network stage boxes and other mixers so that your inputs and outputs can be closer to the sources and destinations.
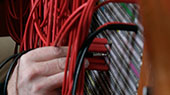
The benefit of a networked system is that you save quite a bit of money, time, and frustration with long cable runs and traditional stage boxes, using a single CAT5 or CAT6 cable to carry literally dozens of audio streams back and forth. Another advantage is flexibility, as the channels on your mixer can be sourced locally or from the network. This allows you customize and reorient your system as your needs change.
Digital Rack Mixers
As their name indicates, many newer digital rack mixers, including the StudioLive Series III rack mixers, are designed to sit in an equipment rack onstage with the musicians. This makes connections more convenient and reduces the need for long cable runs that can introduce noise into your system. This also saves cost on expensive snakes and stage boxes.
Digital rack mixers typically have few, if any, onboard controls. This type of mixer relies on two methods of control: mobile devices and hardware controllers.
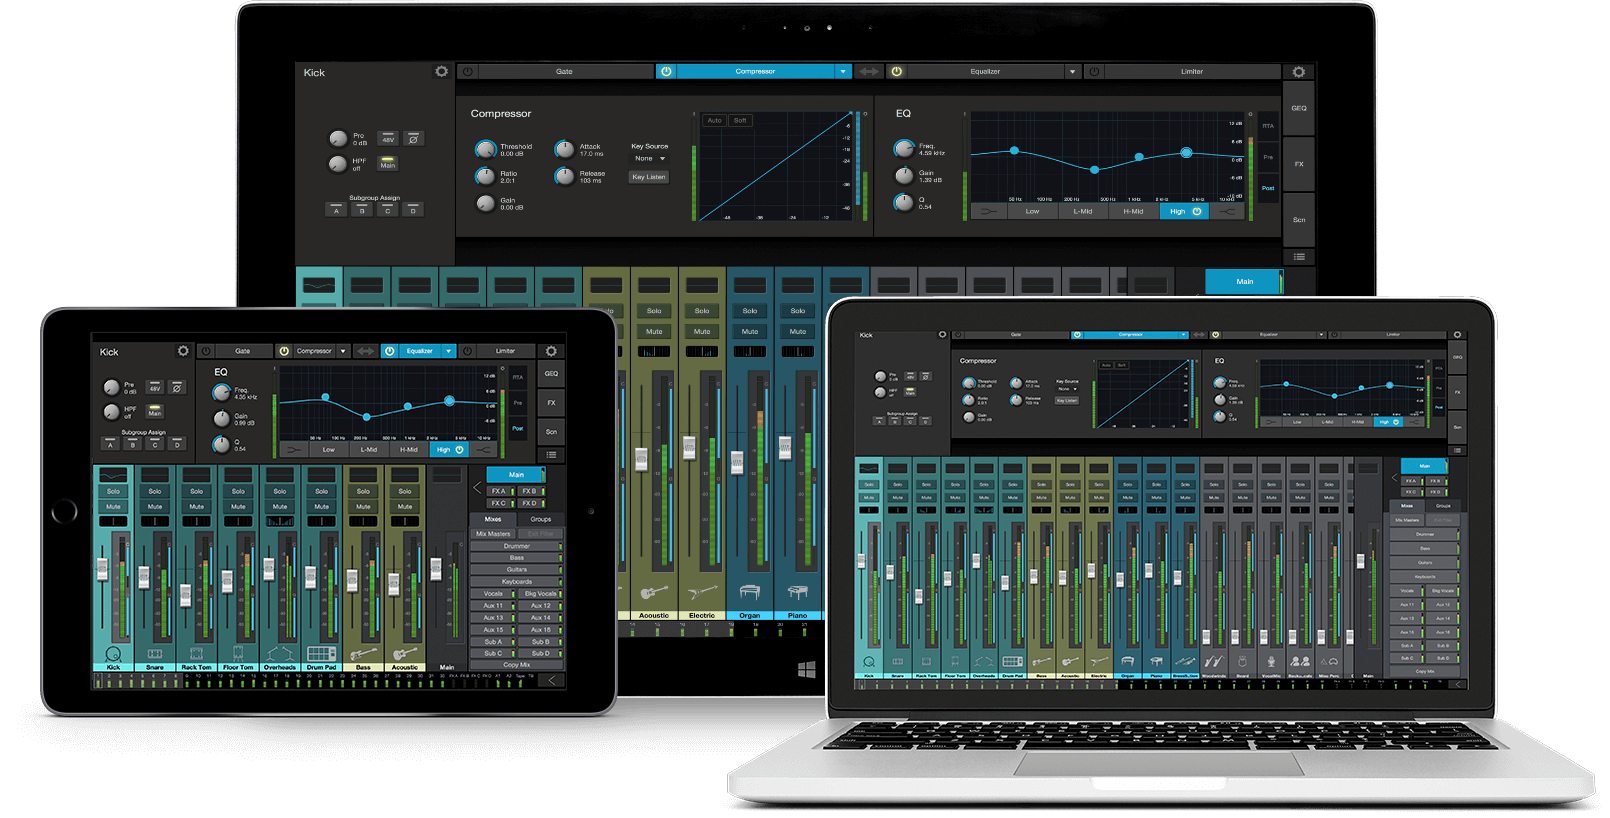 Control applications, such as PreSonus UC Surface for Apple iPad®, Android™ tablet, Mac®, and Windows® provide wireless access to all mixing functions. These control apps are very flexible and highly mobile, enabling you to mix anywhere within wireless range of your mixer. However, for people who are accustomed to a traditional mixer, this may be disorienting at first. This is why PreSonus built UC Surface to be instantly familiar and to provide immediate access to everything you need when controlling your mix. This means that you can view your complete mix and access the feature you need at any given moment. This makes mixing on a touchscreen as easy as mixing on a physical control surface.
Connection Types
Once you’ve selected the type of mixer, the next consideration is the type of connections you’ll need. In general, most mixers feature the following types of connections:
- XLR microphone inputs. For the most part, XLR input connectors are used for microphone preamps and inputs. Usually, they can accept both dynamic and condenser microphones. It should be noted that condenser microphones require phantom power, so if you plan to use them, make sure your mixer has that feature. Some XLR inputs on certain mixers are switchable between mic and line level signals. If this is the case, you will not need a direct box to connect a line-level source.
- ¼” TRS Line Inputs. TRS, or Tip-Ring-Sleeve, line inputs are balanced connections used for line-level devices like synthesizers and outboard processors.
- Aux Inputs. Most mixers provide the ability to connect additional sources to your mixer. These inputs typically are not equipped with processing and are intended for use with consumer electronics, like DVD players. Examples of unbalanced connections are RCA and 1/8-inch TRS connections.
Bus Types
Auxiliary Buses
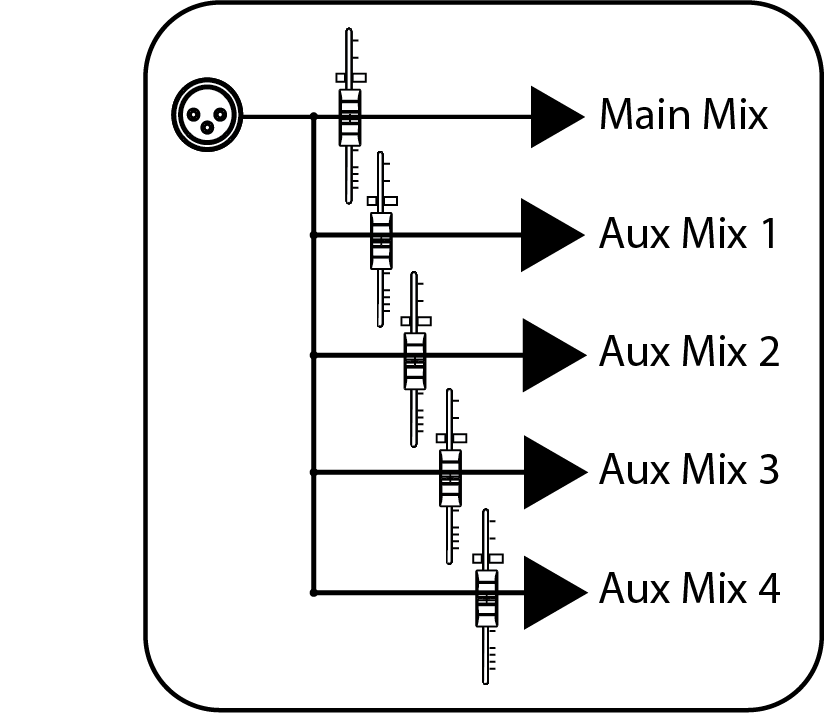 As its name implies, an aux mix allows you to create an alternate, or “auxiliary,” mix that can be routed to an output separate from the Mains. Aux buses have many applications, the two most common of which are creating monitor mixes and inserting external effects processors into the mix. When you turn up the aux send level on a channel, its signal is sent to the corresponding aux output at the level you choose. In this way, the same channel can be used to create several alternate mixes to the main mix.
Most mixers have some ability to send at least one monitor mix to the stage. This is typically done with auxiliary buses (aux buses for short). Let’s say a mixer has one aux bus. On a mixer like this, each channel would have an aux send level control. This control adjusts the volume of each channel in the aux bus mix. You build your monitor mix by setting the individual aux-send levels for any channels you want in that mix. The aux mix output can then be connected to a stage monitor or an in-ear or headphone distribution system. In this way, your musicians can listen to a monitor mix that can be controlled separately from the main mix going out to the house.
If you’re thinking an aux send sounds a lot like a channel fader, you’re way ahead of the game. Just as each channel fader allows you to create a mix for the main output, each aux send allows you to create a mix for the corresponding aux bus output. (Aux sends can also be used for other things like routing controlled amounts of signals to outboard effects.)
If you’re using aux buses exclusively for monitors, the number of aux buses determines the number of discrete monitor mixes you can create. Most lower-cost mixers have one or two. Two aux buses provide two separate mixes, six aux buses provide six separate mixes, and so on. Note that aux buses and their sends are typically mono, so a performer who needs a stereo monitor mix (such as a keyboardist using stereo in-ear monitors) will need two aux buses: one for the left side of the mix, one for right. Keep this in mind when determining how many aux buses you need.
Creating custom monitor mixes is critical. If musicians can’t hear themselves or their bandmates, their performance will suffer. A monitor mix can be mono or stereo. Most often, an individual live monitor mix is mono and is sent to a floor-wedge or sidefill monitor (the obvious exception being in-ear monitor systems). A studio monitor mix is usually stereo because it is sent to a headphone amplifier that requires both a left- and a right-channel input. In both cases, the function of the aux bus is the same.
Another use for an aux mix is to send selected channels to an external effects processor. The processed signal is then patched back to the mixer, usually using an aux input. There are at least two main advantages to creating an effects mix instead of inserting an effect on a channel. First, several channels can be sent to a single processor. In addition to greatly simplifying the number of parameters you must control, this can help to create a cohesive sound for your mix. Second, you can vary the level sent from each channel to the processor, rather than patching the output directly into the effect. This allows you to add a lot or a little of an effect to any given channel.
Subgroups
A subgroup allows you to combine multiple channels into a single bus so that the overall level for the entire group is controlled by a single fader and can be processed as a mix, in addition to the processing available for each channel. Subgroups can also be soloed and muted. You will find many uses for subgroups that will make mixing more convenient and will provide better control of your mix.
Grouping individual instruments that create a section in your mix has obvious advantages: The entire group can be muted or soloed, brought up or down in a mix, and faded in or out for a more polished intro or outro. Because subgroups can also be processed, some common groups are drums, backing vocals, horn sections, and string sections.
Another use for a subgroup is to route specific channels to a subwoofer or a front fill, using the same mix as the main front-of-house system. This is especially useful for subwoofers because you can route only the sources that can be reproduced by the subwoofer, allowing you to run your system more efficiently.
Matrix Mixes
On the simplest level, a matrix mix is a mix of mixes. A matrix mix allows you to combine any bus on your mixer, along with input channels. Matrix mixes can be a Swiss Army knife for solving some of the most problematic audio routing issues.
Common uses for matrix mixes are:
- Feeding the house mix to multiple locations (e.g., the lobby, a webcast feed)
- Creating a front fill mix
In some venues, the house PA doesn’t cover the front rows effectively. This can be especially problematic when the band onstage is using in-ear monitors instead of floor wedges. Without floor wedges, the people seated in the first few rows may actually be “behind” the PA because they will hear more stage volume from the instruments on stage than from the front-of-house system. This problem can be solved by placing a few low-profile fill speakers on the front edge of the stage to cover the first few rows of the audience and using a matrix mix to blend the main left/right mix at a low level with source signals that may be difficult to hear, like the vocal and direct bass channels. StudioLive Series III mixers make this easy by allowing you to mix inputs and outputs for each matrix mix.
Solo Bus
When mixing live, or when recording multiple musicians at once, it is often necessary to quickly listen to just one instrument or group. The solo bus can be used with the monitor bus (if available) to provide the front-of-house engineer with a way to isolate channels in a dedicated mix, without affecting what the audience and musicians hear.
In general, there are three different types of solo options: AFL, PFL, and SIP.
- AFL (After-Fader Listen). AFL sends the channel or subgroup signal to the solo bus post-fader so that you can control the level of the soloed signal with the fader.
- PFL (Pre-Fader Listen). PFL sends the channel or subgroup signal to the solo bus before it reaches the fader so the fader does not affect the soloed signal.
- SIP (Solo In Place). This is also known as “destructive solo.” When channels are soloed in this mode, every channel that isn’t soloed will be muted, and only the soloed channels will be sent to their assigned outputs. While useful for dialing in dynamics during soundcheck, this mode is dangerous during a live show.
Remote Mixing from Anywhere
Although the mixer is the core of a good PA system, it is often tucked out of the way because of space constraints, to hide the cables and the mixer’s flashing lights and to keep the mixer safe from curious or inebriated audience members. The problem is, hiding the mixer usually means locating the sound person away from the “sweet spot.” (The “sweet spot” is the middle position between the two sides of a sound system, where sound reproduction is the most accurate, making it easier to dial in a great mix.)
 When the mix position is not centered within the optimal listening area, you’ll get a lot of exercise running to the ideal listening position, listening for problems, running back to the mixer to correct the problems you heard, and then running back to the sweet spot to verify the problems were corrected. The traditional alternative is to send an assistant out to listen in those locations and report back. Obviously, neither is a desirable way to mix.
Most modern digital mixers solve this by allowing you to remotely control the mixer from a tablet, smartphone, or laptop. This allows the mixer to be placed pretty much anywhere in the venue. This can also be useful when a member of the band also has to act as the audio engineer because they can mix from the stage.
Applications like PreSonus UC Surface allow you to wirelessly control both the front-of-house and monitor mixes, input and output processing, routing, and more from anywhere in the venue. Whether an audio engineer or crew member wants to walk around the venue and onstage to check the mixes, or the bass player is dialing in the front-of-house mix, they can do so with complete wireless control of the mixer.
Remote Monitor Mixing
Large venues and major touring acts generally employ a separate monitor mixer near the stage, in addition to the main mixer at front-of-house. The front-of-house engineer handles the main mix, while the monitor engineer focuses on the needs of the band. This is a luxury that most bands and smaller venues can’t afford. Digital mixers like the StudioLive Series III and StudioLive RML series solve this with an application that runs on a mobile device connected wirelessly to the mixer. The app gives each musician onstage control over their own monitor mix.
 For example, PreSonus QMix®-UC gives up to 16 musicians control over the relative mix levels of their own monitor mixes and makes creating these mixes easy with the Wheel of Me view. This lets you select multiple "Me" channels and turn them all up in your monitor at the same time, while controlling the relative balance between “Me” and the rest of the band.
More advanced users can have complete control of the aux-mix send level and panning (for linked auxes) for each channel from the Aux view. These users can also create four custom groups. This allows them to divide complicated mixes into something more manageable by providing a master fader for a group of channels, while still maintaining the relative balance between them. This is especially useful for drums.
Recording in the Studio and Live
The professional solution for recording to a computer is an audio interface, such as the PreSonus Studio-series USB audio interfaces and Quantum-series Thunderbolt™ audio interfaces. An audio interface converts analog signals to digital and vice versa, routing digital audio to and from a computer, most often via USB or Thunderbolt. If you’re recording live in front of an audience, you already have all your instruments and microphones connected to a mixer, so the problem becomes figuring out how to get the signals into your audio interface at the same time. This isn’t impossible, but it involves advanced setup, cabling, and more than a little audio know-how.
Many modern mixers, including all PreSonus digital and analog mixers, remove this hurdle by building in a professional audio interface that allows you to simply connect the mixer to your computer and hit record in your favorite DAW application – no analog cabling involved.
 PreSonus mixers make this even easier by including both Capture™ and Studio One® for free. Using Capture is especially easy because the software knows which StudioLive mixer you’ve connected to your computer and automatically creates a track for every input channel and a stereo track for recording your main mix. Capture makes recording even easier with its unique Record Now feature. This button creates a new session, arms all tracks for recording, and starts recording instantly with one mouse click.
StudioLive Series III console mixers take this one step further by providing an onboard 34x34 SD recorder with Capture built in, allowing you to create multitrack recordings without a computer. These consoles can simultaneously record to a computer over USB or AVB. StudioLive AR-series and StudioLive Series III rack mixers provide an onboard stereo SD recorder that lets you capture the main mix.
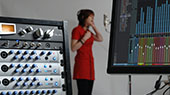
Whether recording live or in the studio, the next step is to mix in a controlled environment. This allows you to add processing, remove microphone handling noise, and level out fluctuating signals. To do this, you’ll need a digital audio workstation (DAW) application. To this end, PreSonus StudioLive mixers include Studio One, a powerful, yet easy-to-use, professional recording and mixing application for Mac and Windows. Of course, StudioLive mixers are compatible with other DAWs that support Core Audio (Mac®) or ASIO (Windows®) but Studio One offers many advantages, including tight integration with StudioLive mixers.
If you have a StudioLive mixer, you can start by simply recording the stereo mix in real time directly to the stereo track in Capture or to the SD recorder. But you don’t have to choose between recording a stereo mix and recording individual tracks.
Recording stereo mixes has disadvantages, especially if you’re simply recording the main mix that is also feeding your house speakers. Let’s say the guitar amp is loud enough in the house that it doesn’t need to be reinforced through the main sound system. If the guitar is not in the front-of-house mix, a recording of that mix won’t include guitar except to the extent the guitar bleeds in through the microphones. Vocals are typically very loud in the house mix so they can be clearly heard; if you record the house mix, your recording probably will be too vocal-heavy. Multitrack recordings are a better solution because they avoid these issues and offer flexible mixing and editing capabilities.
Once you’ve mixed your song, you can upload it directly to SoundCloud from Studio One and push it out to your fans immediately.
Get a Good Soundcheck, Even if the Drummer’s Stuck in Traffic
Another great way to use your recordings is to soundcheck before the whole band arrives. This is where virtual soundcheck can save time and frustration. As its name implies, virtual soundcheck allows you to check the band’s sound without the band. Many modern digital mixers provide some way to do this—some more complex than others—but very few have a true virtual soundcheck that is completely integrated into the mixer. StudioLive mixers provide this amazing experience through Capture’s unique Virtual Soundcheck mode.
 Once Capture is launched, just click the Virtual Soundcheck button and pick one of the recorded live performances you have stored on the computer. This will load the recorded audio onto the tracks in Capture, complete with track names, and engage all digital returns on the StudioLive mixer. You can now play back audio through the system and dial in the mix before the band arrives. StudioLive Series III digital mixers take virtual soundcheck to the next level by allowing you to use a recording on an SD card, enabling soundcheck without a computer.
Virtual soundcheck also comes in handy when musicians are running late, enabling you to dial in a great mix while you’re waiting. When everyone has arrived, simply click the Virtual Soundcheck button again to remove the audio from the Capture session, disengage all the digital returns on the mixer, and arm every track in Capture for recording so you can record the rehearsal or service. Track names in Capture are broadcast throughout the StudioLive network, so when virtual soundcheck is done, the channels on your StudioLive Series III digital mixer, UC Surface, and QMix-UC are labeled and ready to go.
Using Background Tracks
Large touring acts use background tracks to sound arena-sized and to replicate the sound of their albums. If your mixer provides digital returns from your computer, as with StudioLive mixers, this is easy even for the smallest bands. The first step is to record backing tracks in advance. For playback, press the appropriate Digital Return buttons on the StudioLive to route the tracks back through channels on the mixer. These tracks can be as simple as a full stereo mix or as advanced as individual tracks that members of the band have previously recorded to embellish a performance. The keyboardist, for example, might prerecord some orchestral tracks and play the main piano part live.
In some situations, you’ll want one or more members (usually at least the drummer) playing to a click track. A click track is basically just a metronome that makes it easy to sync the live performance with the prerecorded tracks. Since you don’t want the audience to hear the click, mute the corresponding mixer channel in the main mix and just send the click to the aux sends for the appropriate performers’ monitors.
Doing More with Multitrack Recordings
 Multitrack recordings can be a great way to attract new fans, but as with performances, you want to put your best foot forward. While the stereo mix you record in real time and upload to a service like SoundCloud can be a great way to get quick social media promotion, it’s probably not the best quality you can achieve. This is where the integration between Capture, StudioLive, and Studio One comes in.
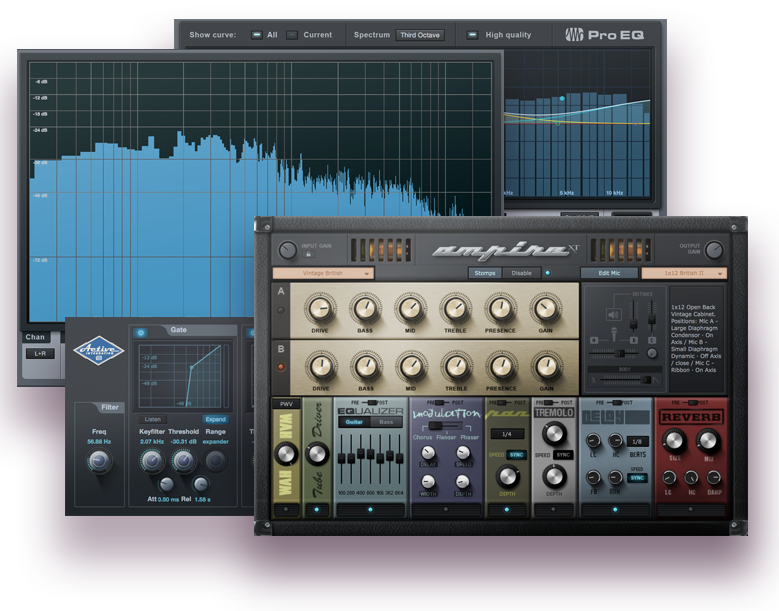
As mentioned earlier, you can simply launch Studio One and open your Capture Session. Unlike most DAWs, bringing in additional tracks or loading plug-ins is as easy as drag-and-drop from Studio One’s browser. (A plug-in is software that provides processing such as reverb, delay, compression, and EQ within a host recording application.) From within Studio One, you have access to a complete suite of signal-processing plug-ins and everything else you need to create a polished, professional quality mix of your performance. You also can use compatible third-party plug-ins.
Plug-ins can be used for processing during the gig, as well as in the studio. For example, if you need a guitar amp but don’t have the space for one, you can insert Studio One’s Ampire XT plug-in on the guitar player’s track in Studio One. Engage the digital return on the guitar player’s mixer channel, and you can use the processed signal while your guitar player is playing live and being recorded in Studio One!