
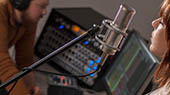


StudioLive® Series III digital mixers can be directly connected to a standard LAN network, allowing to remote control them using UC Surface or QMix®-UC. StudioLive Series III console mixers can also be networked to your Mac® or Windows® computer to control Studio One® Artist.
This article will direct you through the best practices in establishing a stable control network for your StudioLive digital mixer, as well as some networking basics to make you more comfortable troubleshooting any issues that may arise.
What You Will Need
In addition to your StudioLive Series III digtal mixer, you will need the following to network your mixer and use the companion software accessories:
Wireless Router

A wireless router is required to remote control your StudioLive Series III digital mixer using UC Surface or QMix-UC for iOS® or Android™. This device allows data to flow between your mixer, tablet, mobile device, and computer with a single Ethernet cable.
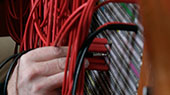
Ethernet Cable

Your mixer requires a hardwired connection to your wireless router. This cable can be acquired at most electronics dealers.
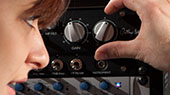
Tablet or Touch-equipped Computer (recommended for UC Surface)

PreSonus UC Surface provides all the controls you need to mix a show without being tied to your StudioLive Series III digital mixer’s hardware surface. It is designed to run on both Apple iPad and Android tablets. Because it also runs on Windows, you can use a Windows Surface or Touch-equipped laptop to remotely control your mixer.
Mobile Device (required for QMix-UC)

QMix-UC provides performers with wireless control over their monitor (aux) mixes onstage and in the recording studio from their mobile devices. It is designed to run on both iOS and Android mobile devices.
Networking Basics
At its core, a network is created when two or more devices (computers, iPads, Android devices, networkable mixers) intelligently share data between one another. In the case of the StudioLive Series III digital mixers and their companion software, this is control data. A network can be as simple as a single StudioLive Series III digital mixer connected to an iPad via a wireless router.
The type of network employed by StudioLive Series III digital mixers is called a Local Area Network or LAN. This type of network is formed by devices within a reasonably close proximity to one another (e.g., same house, same office, or same campus).
Please note that while some of the information in this section applies to standard LAN networks that do not include a StudioLive Series III digital mixer, this section describes requirements and best practices regarding configuring a control network for your StudioLive Series III digital mixer only.
Below are some common terms you may encounter when purchasing and configuring your control network:
- Node. A node is any device connected to a network. This could be a computer, an iOS or Android device, your mixer, etc.
- Segment. This is any part of the network that is separated from other parts of the network by a router, switch, or bridge.
- Topology. The topology describes the way in which each node connects to the network.
- Media Access Control (MAC) Address. This is the physical address of any node on the network. This string of numbers identifies the manufacturer and the serial number of each node’s Network Interface Card or NIC.
Routers and Switches
When connecting multiple nodes in a standard LAN network, you can usually choose to use either a hub, a switch, a router, or some combination thereof. For StudioLive Series III control networks, you must use a router. If your router has an integrated switch, and you require additional Ethernet ports, you can connect a switch to your router; more on that in a minute.
The most common form of routers on the market today are wireless. While there are wired routers, they are less common. PreSonus requires a high-quality wireless router to use mobile devices and tablets, however, you also have the option of connecting your computer wirelessly for both UC Surface use and Studio One control if you would prefer this method over hardwiring your computer to your router.
Let’s take a look at the following simple network:

In this example, we have a StudioLive 16, an Android tablet, and an iPhone communicating with one another through a wireless router with an integrated switch. The StudioLive 16 is connected to the wireless router via its Control port, through an Ethernet LAN port on the integrated switch. The tablet and the iPhone are connected wirelessly.
While you’d never notice this empirically, the router is communicating to each device one at a time, in small data packets. It takes the data packet from the source address and sends it to the destination address. These addresses are derived from the Internet Protocol (IP) addresses of each device on the network. In most cases, these IP addresses are assigned dynamically by the router using the DHCP protocol; however, most devices, including StudioLive Series III digital mixers support Static Self-Assigned and Manual addressing.
The router’s job is to keep track of these data packets and route them to and from the appropriate IP address.
In contrast, a network switch acts as a controller so that information flows more efficiently between devices on a network. In the simplest terms, a switch creates a network, and routers act as the dispatcher, selecting the best path for the information to travel.
Power User Tip: When connecting your mixer to your router, you may find both LAN and WAN ports. WAN ports are sometimes labeled "Internet." This port is firewalled and designed to communicate with Internet Service Providers (ISPs). PreSonus recommends only using the LAN ports on your router.
Adding a Computer
There are three great reasons to network your computer to your StudioLive mixer:
- UC Surface. UC Surface can be used as a second screen for your mixer, you can also back up and organize scenes and presets.
- Capture™. When the computer running Capture is networked to your computer, you can save and recall your StudioLive mix scenes with your Capture audio as well as remote control your mixer’s digital returns for virtual soundcheck.
- Studio One. Networking your StudioLive Series III console mixer to Studio One allows you to use it as a control surface. Additional integration features are also available.
Wired Control
Hardwiring your mixer and your computer to the same router is the easiest configuration:

Connect standard CAT5e or CAT6 Ethernet cables from your computer’s Ethernet port to a LAN port on an Ethernet router and from the router to the Control port on the StudioLive’s rear panel, as depicted above.
NOTE: UCNET doesn’t support dual network connections. If your computer is hardwired to the same router as your mixer, you must disable its wireless connection (if applicable).
Wireless Control
Using a wireless router allows you to remote control your mixer without any additional cabling.

Connect your mixer and your computer to your router as shown above. Make sure you are connecting the Control port of your mixer to a LAN port on your router.
To connect your computer wirelessly to your router:
Windows 7+
- Click on the network icon in the notification area to open the Connect to Network Control Panel.
- Select the name of the wireless network you set for your wireless router.
- Enter the password.
- Click "Connect."
macOS 10.8 and later
- On the Menu bar, click on the Wireless Status icon.
- Select the name of the wireless network you set for your wireless router.
- Enter the password.
- Click "Join"
Power User Tip: In some cases, your router is too far from your mixer and your computer to connect them both. This is where access points can come in handy. These devices allow you to extend your wireless network and provide additional connectivity.
Adding a Tablet

Connecting Your iPad to Your Network
- Tap on the Settings icon in your iPad.
- Tap on “Wi-Fi.”
- Select the network to which your StudioLive is connected and enter the password when prompted.
- Tap "Join."
- Enter the password when prompted and tap "Join."
Connecting Your Android Tablet to Your Network
- Tap on the System Settings icon.
- Tap on “Wi-Fi.”
- Select the network to which your StudioLive is connected and enter the password when prompted. Tap "Join."
- Enter the password when prompted and tap "Join."
Adding a Mobile Device

Connecting Your iPhone/iPod touch to Your Network
- Tap on the Settings icon in your iPhone/iPod touch.
- Tap on “Wi-Fi” making sure it is set to “On.”
- Under “Choose a Network,” select the same network you saved on your StudioLive from the list.
- Tap on the network to select it.
- Enter the password when prompted and tap "Join."
Connecting Your Android Phone to Your Network
- Tap on the System Settings icon.
- Tap on “Wi-Fi.”
- Select the network to which your StudioLive is connected and enter the password when prompted. Tap "Join."
- Enter the password when prompted and tap "Join."